

From Photo to Cinematic Video: Bringing My 8-Year-Old's Toy to Life
ON THIS PAGE
Subscribe To Get Weekly Family AI Discoveries
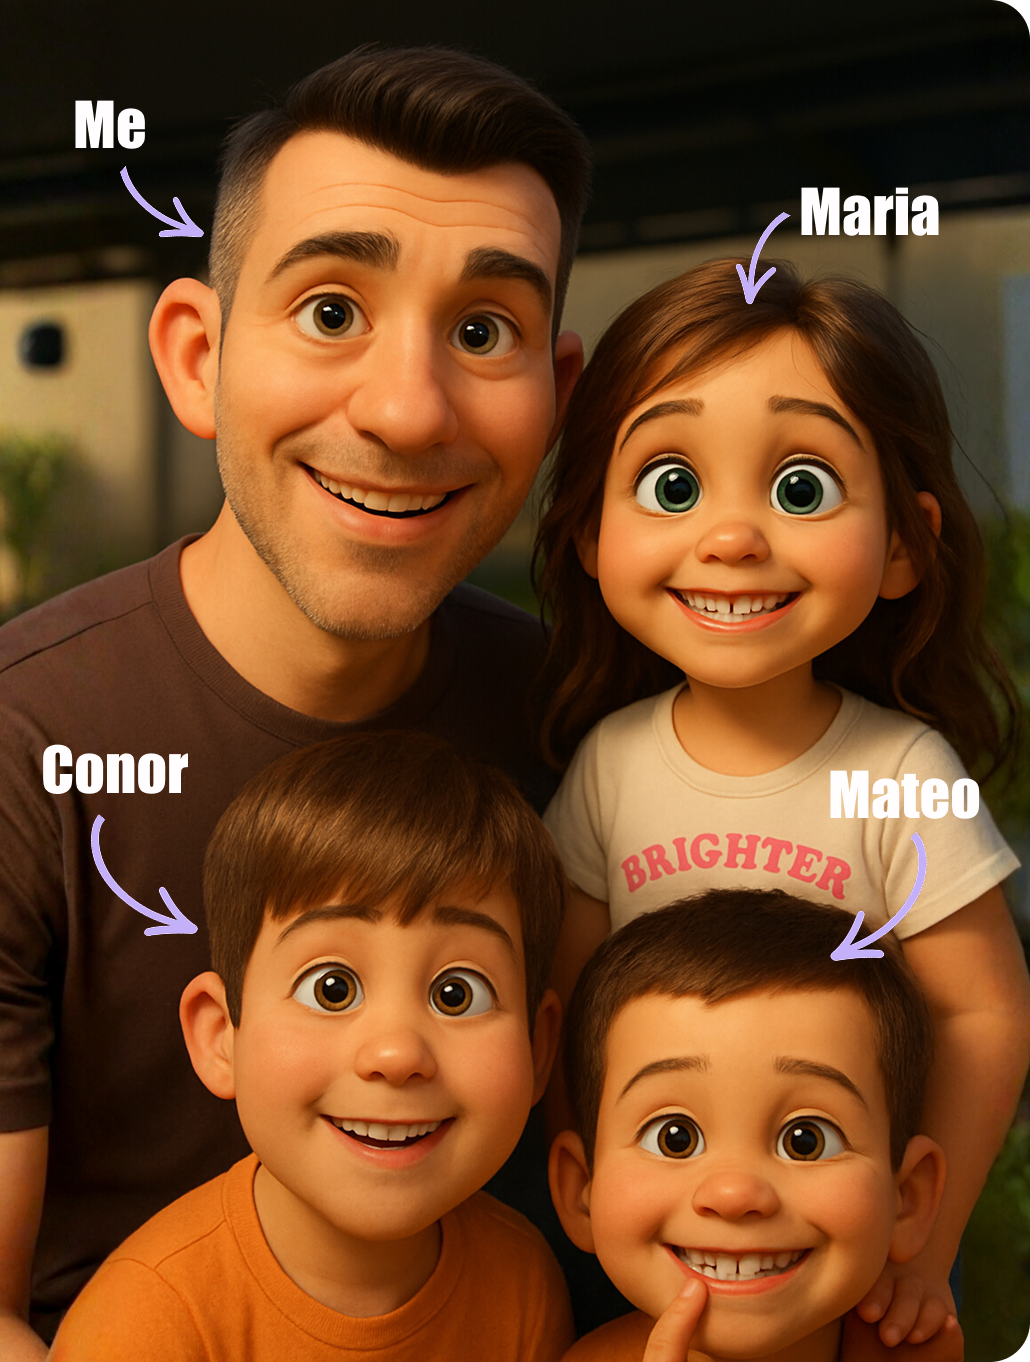
My 8-year-old son Mateo has a robot toy he loves to play with. It's nothing special, just a plastic robot, but it's his favorite.
I wanted to see if I could turn that toy into something cinematic. The vision: the robot suspended in a studio-style product shot, then exploding into all its individual parts, reassembling itself, and finally ending up in Mateo's arms.
Using Kling 2.6's new first and last frame feature (launched this week) combined with Google's Nano Banana Pro for image generation, we created exactly that. Four connected videos totaling about 20 seconds of cinematic footage.
Mateo's reaction when he saw the final result? "That's the coolest thing I ever saw." His eyes went wide. He couldn't believe that from just taking a picture of him with his robot, we created this.
Here's exactly how we did it, the prompts that worked, and whether the cost is worth it.
What you'll need
Tools:
- Higgsfield AI account with Nano Banana Pro access (included with Freepik Premium at approximately 12/month)
- Kling 2.6 subscription (approximately 180/year Black Friday deal = 3,000 credits/month)
- ElevenLabs account for sound effects (free tier works)
- Video editing software (Premiere Pro, CapCut, or iMovie)
- Your child's favorite toy
- 45-60 minutes
Optional but helpful:
- Pixabay.com for royalty-free background music (free)
- White/neutral background image from Google
Cost breakdown for this project:
- Kling credits used: 100 (25 credits per 5-second video x 4 videos)
- Nano Banana Pro tokens: approximately 10 tokens for 5 images
- Sound effects and music: Free
Not sure which tool is right for your child?
Take our free 2-minute quiz and get personalized AI tool recommendations based on your child's age and interests.
Step-by-step: Creating the 5 images
Before creating any videos, you need a series of images that will serve as your first and last frames. Each image represents a moment in your video sequence.
Step 1: Take Photos of the Toy
I took several photos of Mateo's robot from different angles. The one that worked best was a low-angle shot taken in our kitchen. The perspective made the robot look more dramatic and important.
Pro tip: Take more photos than you think you need. Different angles give you options.
Step 2: Create the Product Shot
I wanted the robot to look like a professional product advertisement, suspended on a clean white background.
First, I found a white/hue light background on Google Images. Then I uploaded both images to Nano Banana Pro.
Prompt used:
"Remove the background of the image of the robot and replace it suspended in a 3D render in the center of the frame with the second image as the background."
Result: A professional-looking product shot. The robot looked like it could be advertising an iPhone or tech device.
Step 3: Create the Eye Close-Up
For a dramatic zoom effect, I needed an extreme close-up of the robot's eyes.
Prompt used:
"Show me an extreme close-up of the robot's eyes."
I generated a few versions and picked the one that looked most dramatic.
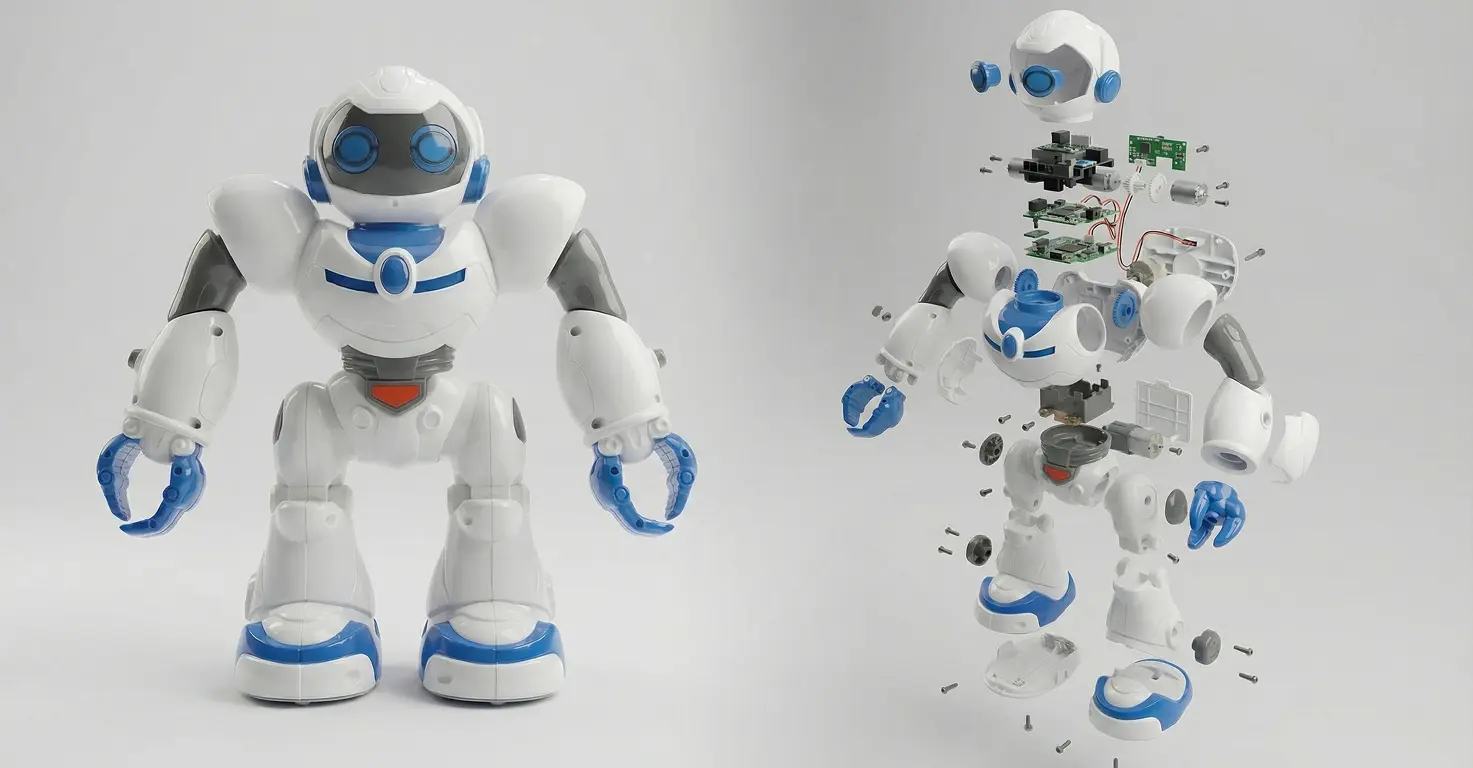
Step 4: Create the Exploded Diagram
This was the key shot. I wanted the robot broken down into all its individual parts, like a technical diagram.
First attempts (failed): The AI kept adding labels and annotations to the parts.
Final prompt that worked:
"Show me an explosion diagram of all parts of this robot, no labels or annotations."
Lesson: Be explicit about what you don't want. "No labels or annotations" fixed the problem immediately.
Step 5: Create the Reassembled Angle
I needed a different angle of the robot with its arm extended for the final reassembly shot.
Prompt used:
"A view of the robot from a diagonal angle."
Simple prompt, effective result.
Step 6: Fix the Aspect Ratio on the Final Shot
I already had a photo of Mateo holding the robot, but it was in the wrong aspect ratio. All other images were 9:16, but this one wasn't.
I uploaded the original photo to Nano Banana Pro and asked it to regenerate in 9:16 aspect ratio. This ensured all 5 images matched for seamless video transitions.
Step-by-step: Creating the 4 videos in Kling 2.6
Kling 2.6 just launched this week with a powerful feature: first and last frame control. You upload a starting image and an ending image, add a prompt describing the transition, and the AI creates the video between them.
Video 1: Product Shot to Eye Close-Up
Start frame: Robot suspended in product shot
End frame: Extreme close-up of robot's eyes
Prompt:
"Smooth cinematic zoom in onto the robot's eyes."
Settings: 5 seconds, Kling 2.6 model
Credits used: 25
Result: Beautiful cinematic zoom. The camera smoothly pushes in from the full product shot to the eyes.
Video 2: Eyes to Exploded Parts
Start frame: Close-up of robot's eyes
End frame: Robot exploded into individual parts
Prompt:
"Cinematic smooth explosion of the robot into the diagram."
Credits used: 25
Result: The robot beautifully unravels from its complete form into all the disassembled parts. This was the most impressive transition.
Video 3: Exploded Parts to Reassembled
Start frame: Exploded parts diagram
End frame: Robot reassembled with arm extended (diagonal angle)
Prompt:
"The robot reassembles itself smoothly and zooms out to see the completed product."
Credits used: 25
Result: The parts come back together from one angle, then the camera zooms around to reveal the final pose with the arm out.
Video 4: Reassembled to In Mateo's Arms
Start frame: Robot reassembled
End frame: Mateo holding the robot with a smile
Prompt:
"The robot ends up in my son's arms."
Credits used: 25
Result: Kling did something clever here. It showed Mateo's arms reaching into what looked like a white studio box, grabbing the robot, then looking at the camera with a smile. Creative interpretation of the prompt.
Adding sound effects and music
The videos looked great, but they needed audio to feel complete.
Sound Effects (ElevenLabs)
I used ElevenLabs' sound effects search. Each search gives you 4 sample options for free.
Sounds I searched for:
- "Swoosh" for the zoom transitions
- "Clock parts moving" for the disassembly/reassembly
- "Machine parts" for additional mechanical sounds
- "Laser weapon" for when the robot lifts its arm
Background Music (Pixabay)
I downloaded royalty-free background music from Pixabay.com to give the video extra energy. Something cinematic and techy.
Stitching It Together
I used Premiere Pro to combine all 4 videos, layer in the sound effects, and add the background music. CapCut or iMovie would work just as well for this.
Total editing time: About 15 minutes
What worked
First and Last Frame Gave Precise Control
Unlike text-to-video where you hope the AI interprets your prompt correctly, first and last frame guarantees your start and end points. The AI just fills in the middle.
Lesson: When you need specific shots to connect, this feature is essential.
100 Credits for 4 Videos Is Efficient
At 25 credits per 5-second video, I used only 100 credits out of my 3,000 monthly allowance. That's 3.3% of my monthly budget for a complete project.
Lesson: You can create many projects per month without worrying about running out.
Nano Banana Pro Created Consistent Images
All 5 images looked like they belonged in the same universe. Same lighting, same style, same quality. This made the video transitions seamless.
Sound Effects Elevated Everything
The videos were impressive silent. With sound effects, they felt professional. The mechanical sounds during reassembly made Mateo's eyes go wide.
What didn't work
Face Morphing on Mateo
In Video 4, as Mateo reaches for the robot and looks up, his face doesn't quite look like him at the start of the clip. By the final frame (the uploaded photo), it looks correct.
This is a common limitation with all AI video models when working from a single reference image. The AI has to guess what the face looks like from different angles.
Workaround: Use shorter clips or accept minor imperfections. The final frame is what matters most.
Labels on Exploded Diagram (First Attempts)
My first few generations of the exploded diagram included labels and annotations on each part. Had to add "no labels or annotations" explicitly to the prompt.
Lesson: Be explicit about what you don't want, not just what you do want.
Tips and tricks
Before you start:
- Plan your sequence on paper first. Know exactly which shots you need before generating anything.
- Take multiple photos of the toy from different angles. More options = better results.
- Keep all images in the same aspect ratio (we used 9:16 throughout).
During image generation:
- Use reference images from the same generation session for consistency.
- Be explicit about what you don't want ("no labels," "no text," "no background").
- Generate multiple versions and pick the best. It only costs a few tokens.
During video generation:
- Keep prompts simple and focused on the transition, not the content.
- 5-second videos are usually enough. 10 seconds can feel slow.
- Think about how videos will connect when choosing end frames.
For the final edit:
- Layer multiple sound effects for richness.
- Background music should be subtle, not overpowering.
- Watch the final video with your child before sharing. Their reaction tells you if it works.
What I'd do differently: Plan more shots upfront. I ended up with exactly what I needed, but having backup angles would have given more creative options.
Troubleshooting
Problem: Exploded diagram includes labels and text
Solution: Add "no labels or annotations" to your prompt explicitly.
Problem: Images don't match in style/lighting
Solution: Generate all images in the same session using previous outputs as references.
Problem: Face looks different in video transitions
Solution: This is an AI limitation. Keep clips short and ensure the final frame uses your actual photo.
Problem: Video transition looks jumpy, not smooth
Solution: Make sure start and end frames are visually related. Dramatic changes (different backgrounds, lighting) create jarring transitions.
Problem: Running out of Kling credits
Solution: Plan your shots carefully before generating. At 25 credits per video, each attempt counts.
Problem: Aspect ratios don't match between images
Solution: Use Nano Banana Pro to regenerate images in your target aspect ratio (9:16 for vertical, 16:9 for horizontal).